- Section
- Troubleshooting: Missing Icons
- Spectra Patterns
- Contact Form 7: Multiple Column Fields
- Contact Form 7: Checkbox / Radio / Acceptance Control
- Unable To Style Contact Form 7
- Tab Index For Multiple Gravity Forms
- Getting Started With Spectra
- Exclude Heading From TOC
- Block Display Conditions
- Import Single Pages, Templates, & Block Patterns
- Enable/Disable Design Library Button
- Copy & Paste Style
- Container Flex Property
- Default Content Width
- Blocks Editor Spacing
- Collapse Panels
- Responsive Conditions
- Dynamic Content Extension
- Site Visibility
- Spectra Actions: Clear Cache
- Quick Action Bar
- Add Multiple Instagram Accounts
- Grid Builder
- Move Title Bar To Top
- Resolving Container Layout Conflicts
- Register High-Privileged Users
- User Roles Access To AI
- Database Update Instructions (Below 2.0.0)
- FAQ's: VIP Priority Support
- Whitelist Email Address
- Using ACF Repeater Field in Spectra
- Pixabay Image Search Feature
- How to Fix Stretched Spectra Images in WordPress 6.7
- How to Change Breakpoints in Spectra?
- Controlling Access to the Spectra Design Library Based on User Roles
- Multi-Column Form Block Using Utility Classes
- Why Am I Seeing Mixed Content or Non-HTTPS Errors?
- Importing Starter Templates With Spectra
- Getting Started With Spectra
- Manually Install Spectra Via FTP
- Automatic Beta Updates
- Rollback To Previous Versions
- Load Google Fonts Locally
- Activate Spectra Pro License
- Install Spectra Pro
- Translate Strings With Loco Translate
- Process Refund Requests
- Transparent / Sticky Header
- Change Site Logo
- Change Global Styles
- Disable Title on Posts & Pages
- Transparent / Sticky Header For Single Page / Post
- Change Header & Footer Patterns
- Custom / Google Fonts
- Reset Global Default Styling
- Manually Install Spectra One Via FTP
- Enable / Disable Header & Footer On Specific Pages / Posts
Quick Action Bar
The “Quick Action Bar” feature in Spectra enhances your page designing experience by introducing a dynamic panel on the left side of the editor.
This convenient feature allows you to curate a personalized collection of frequently used blocks for quick access while designing your page.
This guide will show you how to use the Quick Action Bar to make building pages quick and easy.
What are the Key Features of Quick Action Bar
- Effortless Accessibility: The Quick Action Bar eliminates the need to scroll through the block library. Instead, it provides a dedicated space where you can easily pick your favorite blocks, ensuring swift access during the page-building process.
- Time-Saving: With your preferred blocks readily available in the Quick Action Bar, you save valuable time that would otherwise be spent searching for specific elements in the block library.
- Enhanced Focus: By streamlining the block selection process, this feature offers a more focused and efficient page-building experience. You can concentrate on your creative workflow without interruptions.
How To Enable/Disable Quick Action Bar Option
The Quick Action Bar comes with a user-friendly enable/disable option, giving you control over when to utilize this feature based on your workflow preferences.
You can enable this feature directly from the Spectra Dashboard by heading to Spectra > Blocks / Extensions. Within this section, you’ll find the toggle to enable the Quick Action Bar.
While you can enable the Quick Action Bar globally from the Spectra Dashboard, you also have the flexibility to control it on a page-by-page basis. Here’s how:
- Choose any page or post where you want to use the Quick Action Bar.
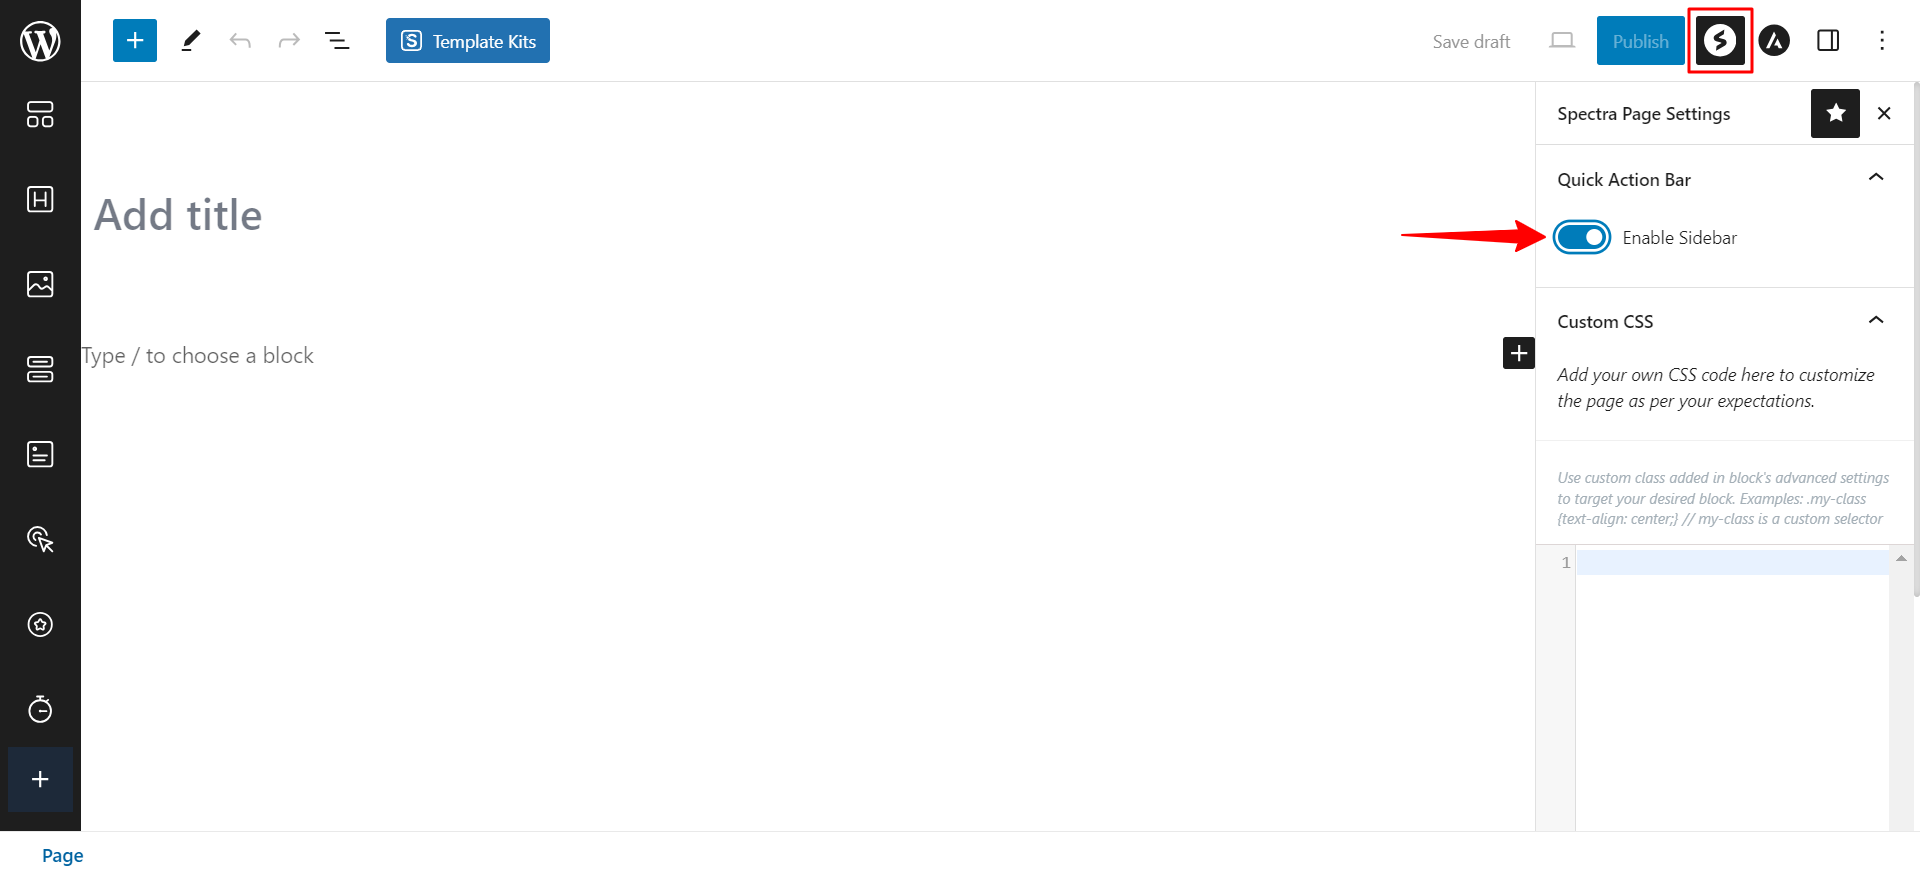
- Look for the Spectra icon within the editing screen. It’s usually located near the top right side of the editor.
- Click on the Spectra icon and then find the section called “Spectra Page Settings“.
- Within the Spectra Page Settings, you’ll see a clear option to enable or turn on the Quick Action Bar. Simply enable the toggle to activate it.

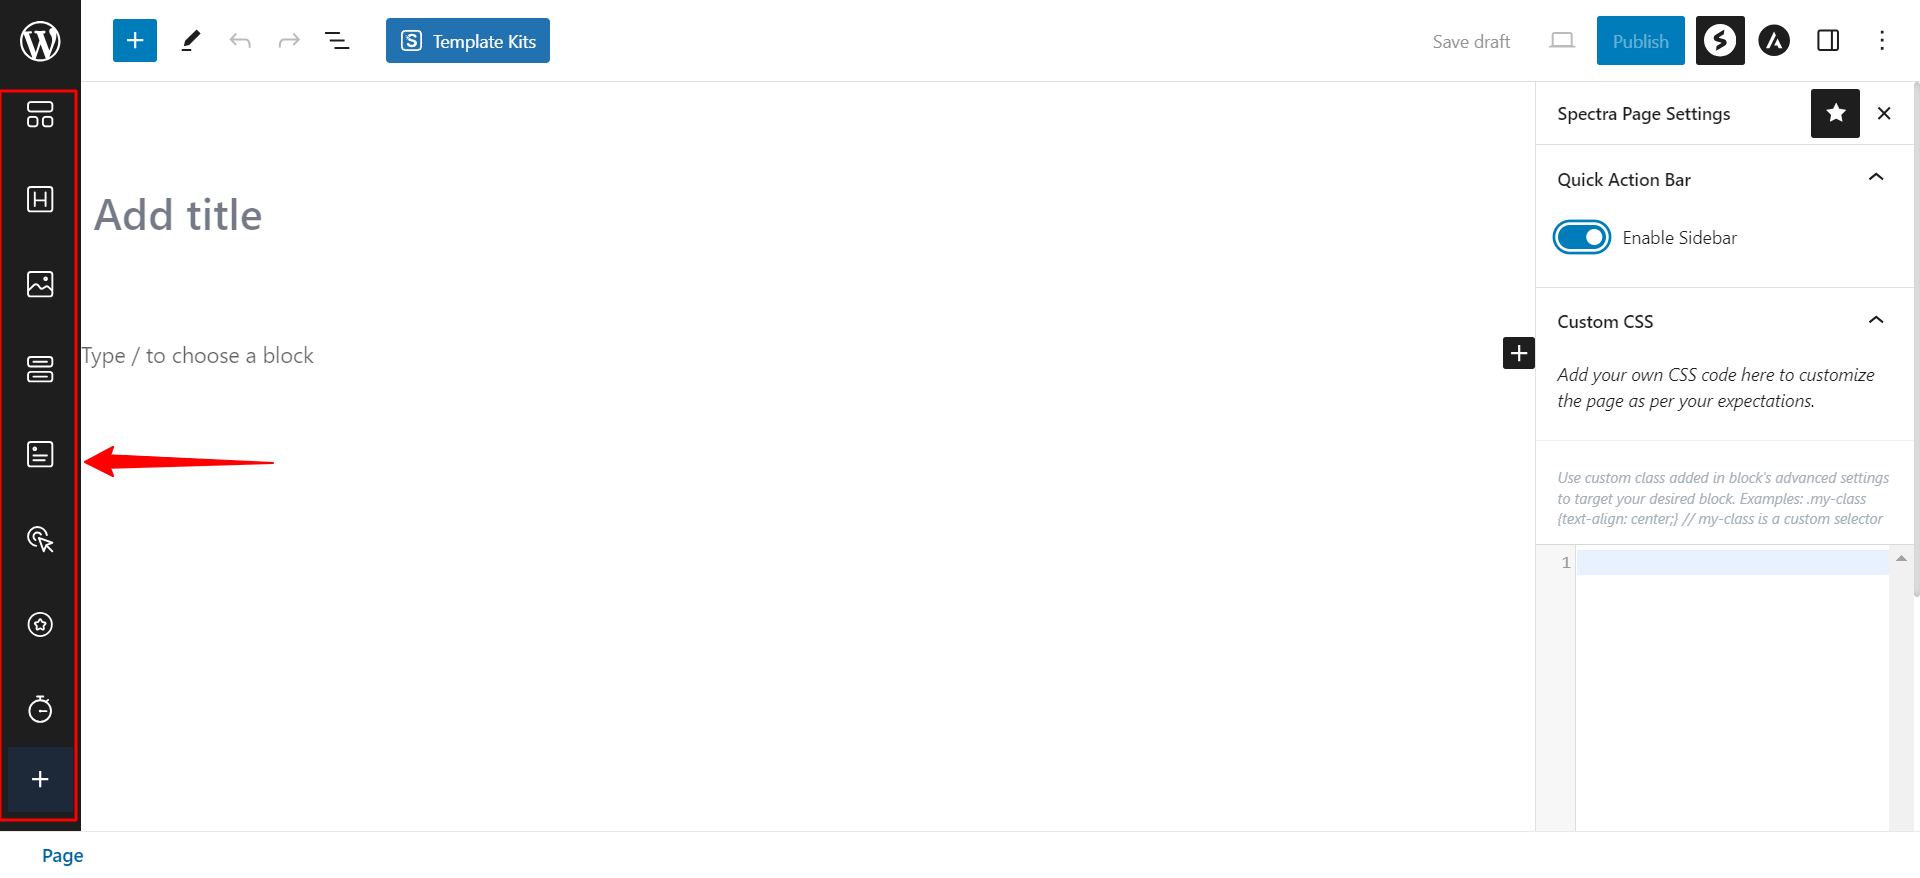
Once you enable the option, you will see a panel with a personalized collection of frequently used blocks on the editor’s left side.

You don’t need to scroll and find blocks in the block library. From here, you can simply drag your favorite blocks for instant access while building a page.
How to Add or Remove a Block in the Quick Action Bar
The Quick Action Bar provides convenient access to your favorite blocks, streamlining your page-building workflow. Here’s how to add and remove blocks within it:
- Click on the “+” icon in the dynamic panel on the left side of the editor.
- Browse through the Block Library or use the search bar to find the block you want to add.
- Simply click on the desired block to add it to the designated area beside the existing blocks in the Quick Action Bar.
Imagine you want to incorporate a handy contact form within your page. With the Quick Action Bar, it’s just a few clicks away. Click the “+” icon in the editor, then search for “form” in the block library. Upon finding it, simply click on it to add it to the Quick Action Bar. Now, that powerful form block is readily available for you to drop directly onto your page whenever you need.
Removing blocks from the Quick Action Bar is just as easy as adding them. Here is the ways to do it:
- Position your cursor on the block you want to say goodbye to.
- A tiny “X” icon appears in the top right corner of each block when you hover over it. Click this icon to instantly remove the block from the Quick Action Bar.
Please remember, you can customize your Quick Action Bar however you like, adding and removing blocks based on your current needs and workflow. You can keep it organized and efficient to maximize your page-building productivity.
We hope this document has been helpful. If you have any queries further, feel free to leave a comment below.
We don't respond to the article feedback, we use it to improve our support content.