- Using Heading Block
- Buttons
- Post Grid
- Content Timeline
- Social Share
- Google Map
- Add Testimonials
- Info Box
- Team
- Icon List
- Price List
- Post Masonry
- Post Carousel
- Post Timeline
- Call To Action
- Advanced Columns
- Blockquote
- Marketing Button
- Table Of Contents
- How-to Schema
- FAQ’s: Schema/Accordion
- Inline Notice
- WP – Search
- Review Schema
- Lottie
- Taxonomy List
- Tabs Block
- Create Contact Forms
- Star Rating
- Masonry Image Gallery
- Wireframe Blocks
- Heading Block
- Image Block
- Buttons Block
- Translate Everything WPML
- Container Block
- Taxonomy Styling Options
- Block Presets
- Image Gallery
- Counter Block
- Modal Block
- Registration Form Block
- Slider Block
- Pagel Level Custom CSS
- Countdown Pro
- Slider Custom Navigation
- Instagram Feed
- Loop Builder
- Animations
- Login Form Block
- Global Block Style Extension
- Create Popups
- Custom Blocks
- Move Block Patterns
- Grid Builder
- Newsletter Forms
- Register High-Privileged Users
- Hide Core Blocks
- Getting Started with Instagram
- Advanced Loop Builder
- Section
- Troubleshooting: Missing Icons
- Spectra Patterns
- Contact Form 7: Multiple Column Fields
- Contact Form 7: Checkbox / Radio / Acceptance Control
- Unable To Style Contact Form 7
- Tab Index For Multiple Gravity Forms
- Getting Started With Spectra
- Exclude Heading From TOC
- Block Display Conditions
- Importing Starter Templates With Spectra
- Getting Started With Spectra
- Manually Install Spectra Via FTP
- Automatic Beta Updates
- Rollback To Previous Versions
- Load Google Fonts Locally
- Activate Spectra Pro License
- Install Spectra Pro
- Translate Strings With Loco Translate
- Process Refund Requests
- Transparent / Sticky Header
- Change Site Logo
- Change Global Styles
- Disable Title on Posts & Pages
- Transparent / Sticky Header For Single Page / Post
- Change Header & Footer Patterns
- Custom / Google Fonts
- Reset Global Default Styling
- Manually Install Spectra One Via FTP
- Enable / Disable Header & Footer On Specific Pages / Posts
Wireframe Blocks
Note:
The Wireframe block has been deprecated and replaced with the newly enhanced adaptive design library.
Wireframing the structure of any website before beginning the design process is very important. It increases work efficiency, makes the workflow more effortless, and helps you get the final website design ready in less time. Now you can create your page or website mockup faster than ever with Spectra Wireframe Blocks.
This document will help you to understand how wireframe blocks work and what benefits they bring.
What Are the Wireframe Blocks?
Wireframing means having a basic structure of your webpage like some sections, their layout, image position, text position, and so on. This gives you an idea of how you can manage content on any webpage.
But if you ever try creating wireframes using online tools or even with simple pen-paper, you will understand it is not quite easy. You will have to understand and study how the online tool works. And well, working with pen-paper is neither convenient nor reliable as the design might end up undone.
Usually, you would create wireframes on external platforms and then transfer the designs to your website. Spectra offers ready-to-use Wireframe blocks right inside the Gutenberg editor, helping you avoid those extra efforts. You can now create your wireframe design directly on your website.
Benefits of using wireframe blocks:
- Provides basic structure to start any website design.
- Save your time in creating a wireframe with an external tool or traditional pen-paper
- Just replace the image, text, and add colors in the wireframe to make the final website design ready in less time
- Make website designing smooth and effortless
How To Use the Wireframe Blocks?
The Wireframe blocks can be accessed through the page/post editor. You can add an unlimited number of blocks and create the whole page or post structure in no time.
Note:
The Wireframe Blocks are available with Spectra version 1.25.0 and above.
We’ll show you an example of how you can create a page structure that you can share with your team or client:
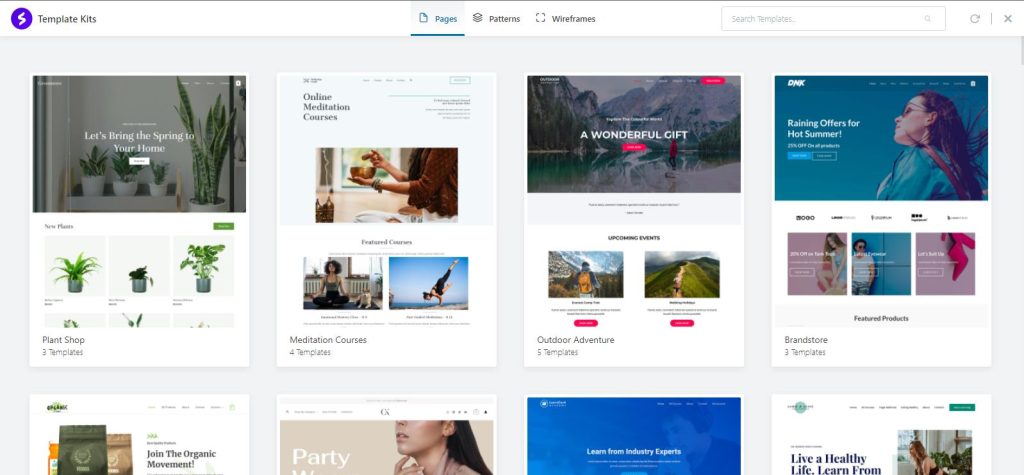
Step 1 – Navigate to Dashboard > Pages > Add New. In the top menu of the page editor, click on the “Spectra Templates” button. This will open the Spectra Templates Library;

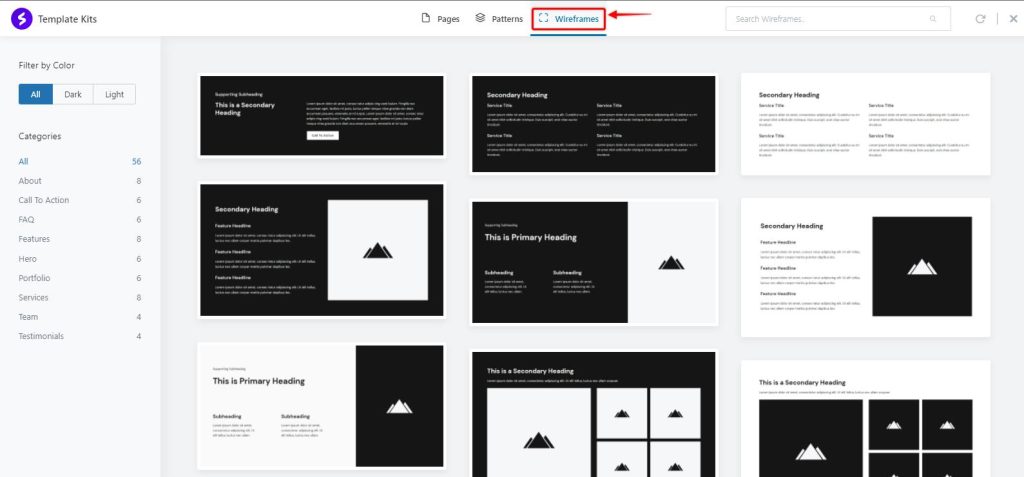
Step 2 – In the top menu of the Library, click on the “Wireframes” tab. Here you can find all wireframe blocks available;

Note:
If you don’t see the Wireframe blocks, please sync the Spectra templates Library (the “Sync” button is located in the top right corner of the Library).
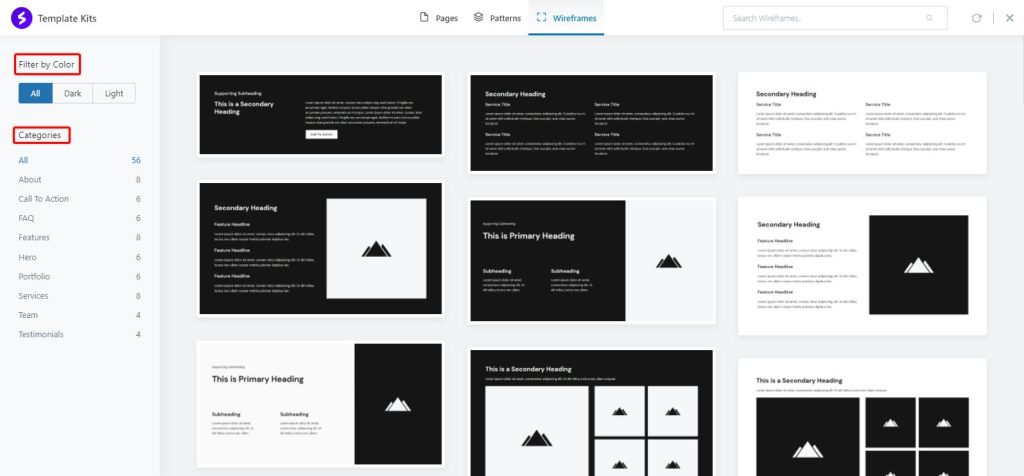
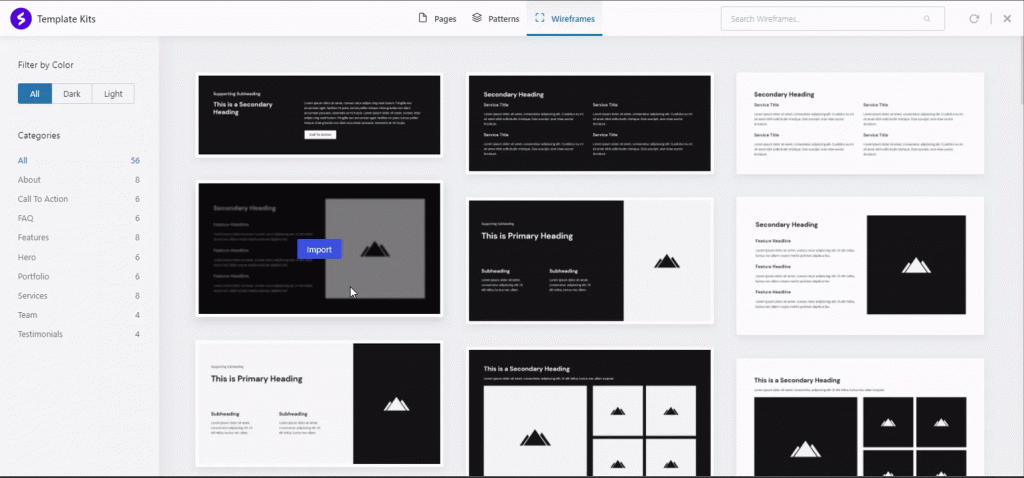
Step 3 – Here, you can filter the blocks by color and category and import the wireframe block to your page. You can do this by hovering over the block you need and clicking on the “Import” button;


Step 4 – Repeat steps 2 and 3 until you import all the blocks you need;
Step 5 – Once imported, you can reposition and modify blocks as you wish. Once your wireframe design is done, click on the “Publish” button to save your changes.
Now you’re ready to review and share your wireframe page mockup with whomever you want.
Once the final page design is decided, there is no need to create a new page. You can directly modify the wireframe blocks as needed and replace placeholders with your content.
That’s all. Your wireframe design is turned into the final design in no time.
We don't respond to the article feedback, we use it to improve our support content.