- Using Heading Block
- Buttons
- Post Grid
- Content Timeline
- Social Share
- Google Map
- Add Testimonials
- Info Box
- Team
- Icon List
- Price List
- Post Masonry
- Post Carousel
- Post Timeline
- Call To Action
- Advanced Columns
- Blockquote
- Marketing Button
- Table Of Contents
- How-to Schema
- FAQ’s: Schema/Accordion
- Inline Notice
- WP – Search
- Review Schema
- Lottie
- Taxonomy List
- Tabs Block
- Create Contact Forms
- Star Rating
- Masonry Image Gallery
- Wireframe Blocks
- Heading Block
- Image Block
- Buttons Block
- Translate Everything WPML
- Container Block
- Taxonomy Styling Options
- Block Presets
- Image Gallery
- Counter Block
- Modal Block
- Registration Form Block
- Slider Block
- Pagel Level Custom CSS
- Countdown Pro
- Slider Custom Navigation
- Instagram Feed
- Loop Builder
- Animations
- Login Form Block
- Global Block Style Extension
- Create Popups
- Custom Blocks
- Move Block Patterns
- Grid Builder
- Newsletter Forms
- Register High-Privileged Users
- Hide Core Blocks
- Getting Started with Instagram
- Advanced Loop Builder
- Section
- Troubleshooting: Missing Icons
- Spectra Patterns
- Contact Form 7: Multiple Column Fields
- Contact Form 7: Checkbox / Radio / Acceptance Control
- Unable To Style Contact Form 7
- Tab Index For Multiple Gravity Forms
- Getting Started With Spectra
- Exclude Heading From TOC
- Block Display Conditions
- Importing Starter Templates With Spectra
- Getting Started With Spectra
- Manually Install Spectra Via FTP
- Automatic Beta Updates
- Rollback To Previous Versions
- Load Google Fonts Locally
- Activate Spectra Pro License
- Install Spectra Pro
- Translate Strings With Loco Translate
- Process Refund Requests
- Transparent / Sticky Header
- Change Site Logo
- Change Global Styles
- Disable Title on Posts & Pages
- Transparent / Sticky Header For Single Page / Post
- Change Header & Footer Patterns
- Custom / Google Fonts
- Reset Global Default Styling
- Manually Install Spectra One Via FTP
- Enable / Disable Header & Footer On Specific Pages / Posts
Using Spectra Heading Block
In Spectra, the heading block lets you design headings and subheadings that are informative and look great. You can customize them, and add interactive features, and they work well on different devices.
Now, let’s check out the next part of this document to learn more about how the heading block is used and its features.
What is Spectra Heading Block
The Spectra Heading Block is a super handy block for creating content using headings and subheadings.
It doesn’t matter if you’re new to making websites on WordPress or if you’ve done it before – using Spectra’s heading block makes your content look way better and more interesting with lots of easy-to-use, yet powerful customization options.

What are the Uses of Heading Block
The Spectra provides stunning options with the Heading Block. You can customize your headings, add a sub-heading, use a separator, and customize them completely.

Here are some important things you can do with the Spectra Heading Block:
- You can easily add main headings, sub-headings, and even links to headings.
- You have the flexibility to align your headings in various ways – left, center, or right.
- You’re in control of the fonts and colors for your headings and sub-headings, giving your content a personalized touch.
- You can add a separator between the main heading and subheadings. Also, you can customize the separator’s height, width, and color options.
- You can manage the spacing between your main heading, sub-heading, and the separator to make everything look just right.
How to Create a Heading in Spectra
Now that we understand more about why you might want to use a Spectra Heading block, let’s look at how you can create one in a few simple steps.
Note that for this tutorial, we’ll assume you already have Spectra installed and activated on your website.
Once you have Spectra installed on your site, you can simply follow the steps below.
Add Spectra Heading Block
To get started, navigate to the page or post where you want to insert your heading. Then, click on the + icon at the top of the screen.
This will launch the Spectra interface. From the blocks on the left, search for and select the Heading block.
Align the Heading and Sub-heading
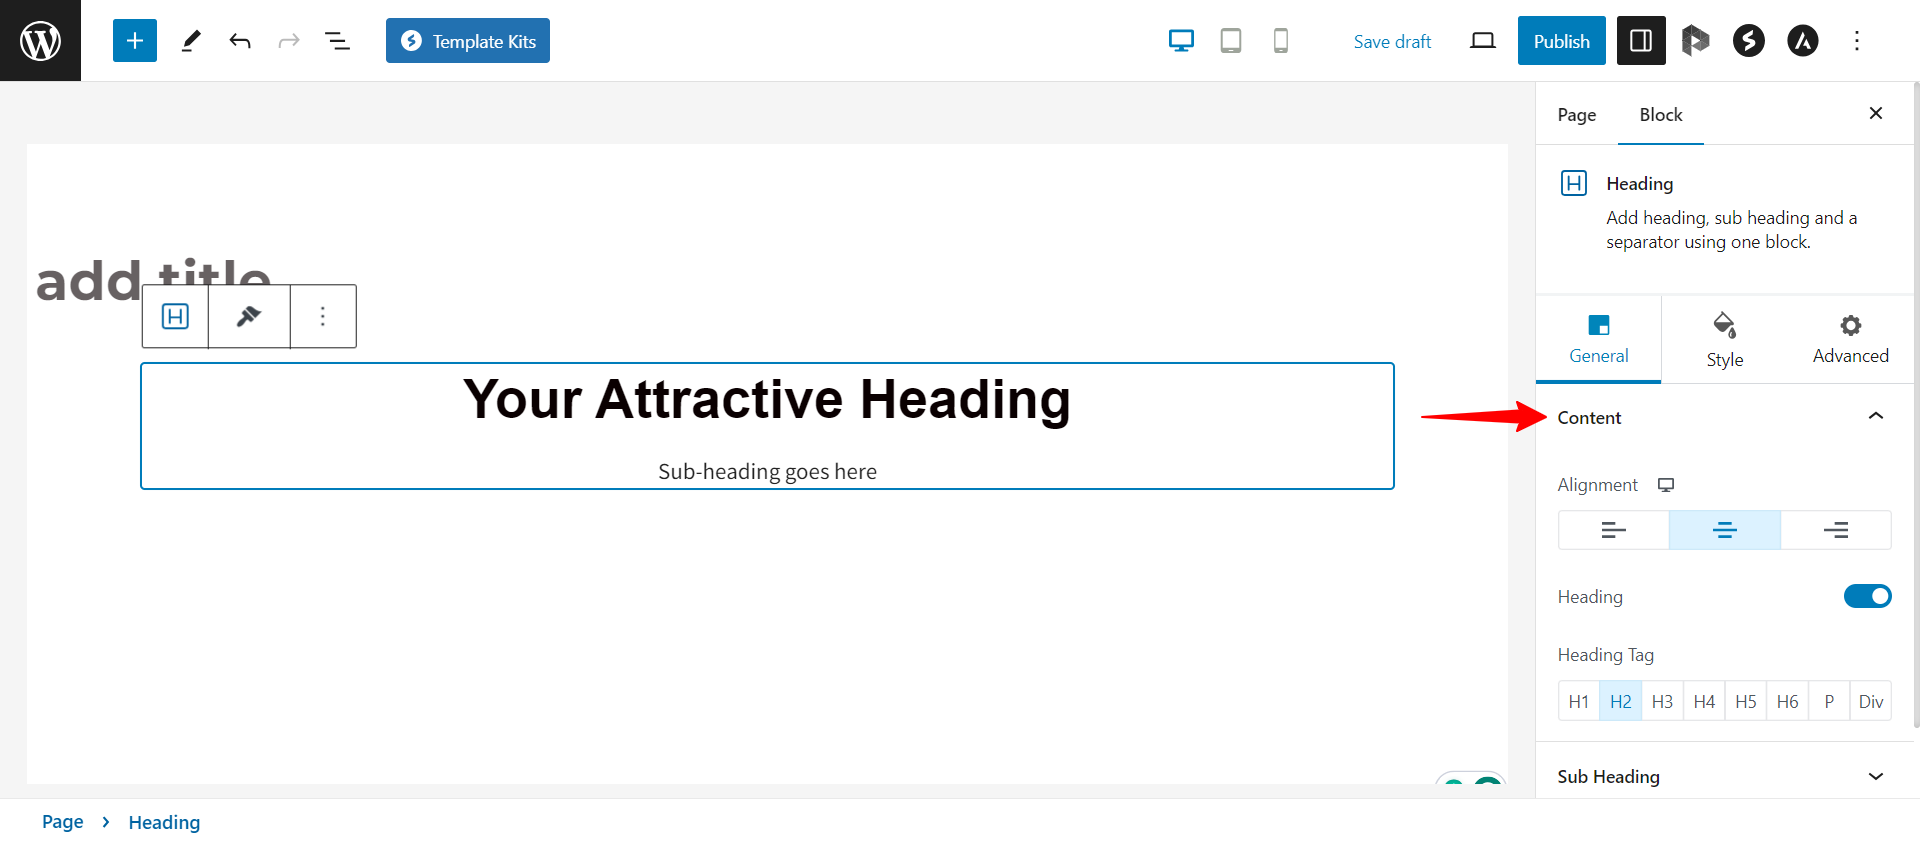
Under the General tab, you can choose alignment for the content i.e., for heading, separator, and subheading.
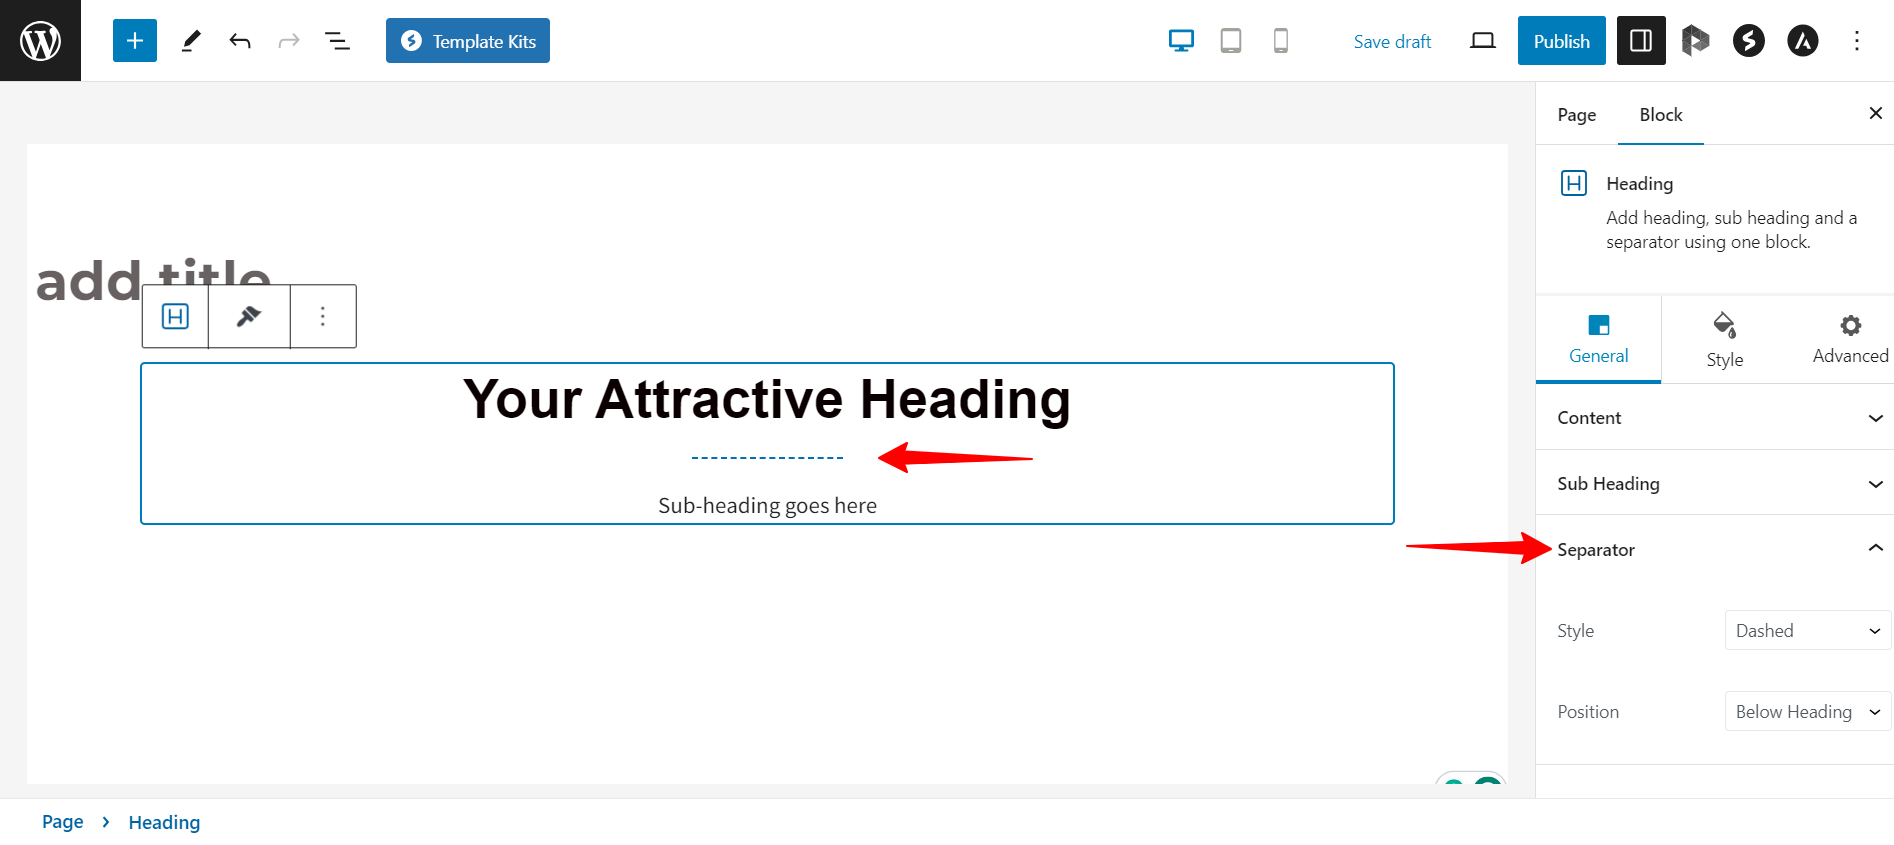
Customize separator
Under the General tab, you will find an option to set the style for a separator. Under the Style tab, you can set the Width, Thickness, Color, and Bottom Spacing for the separator.
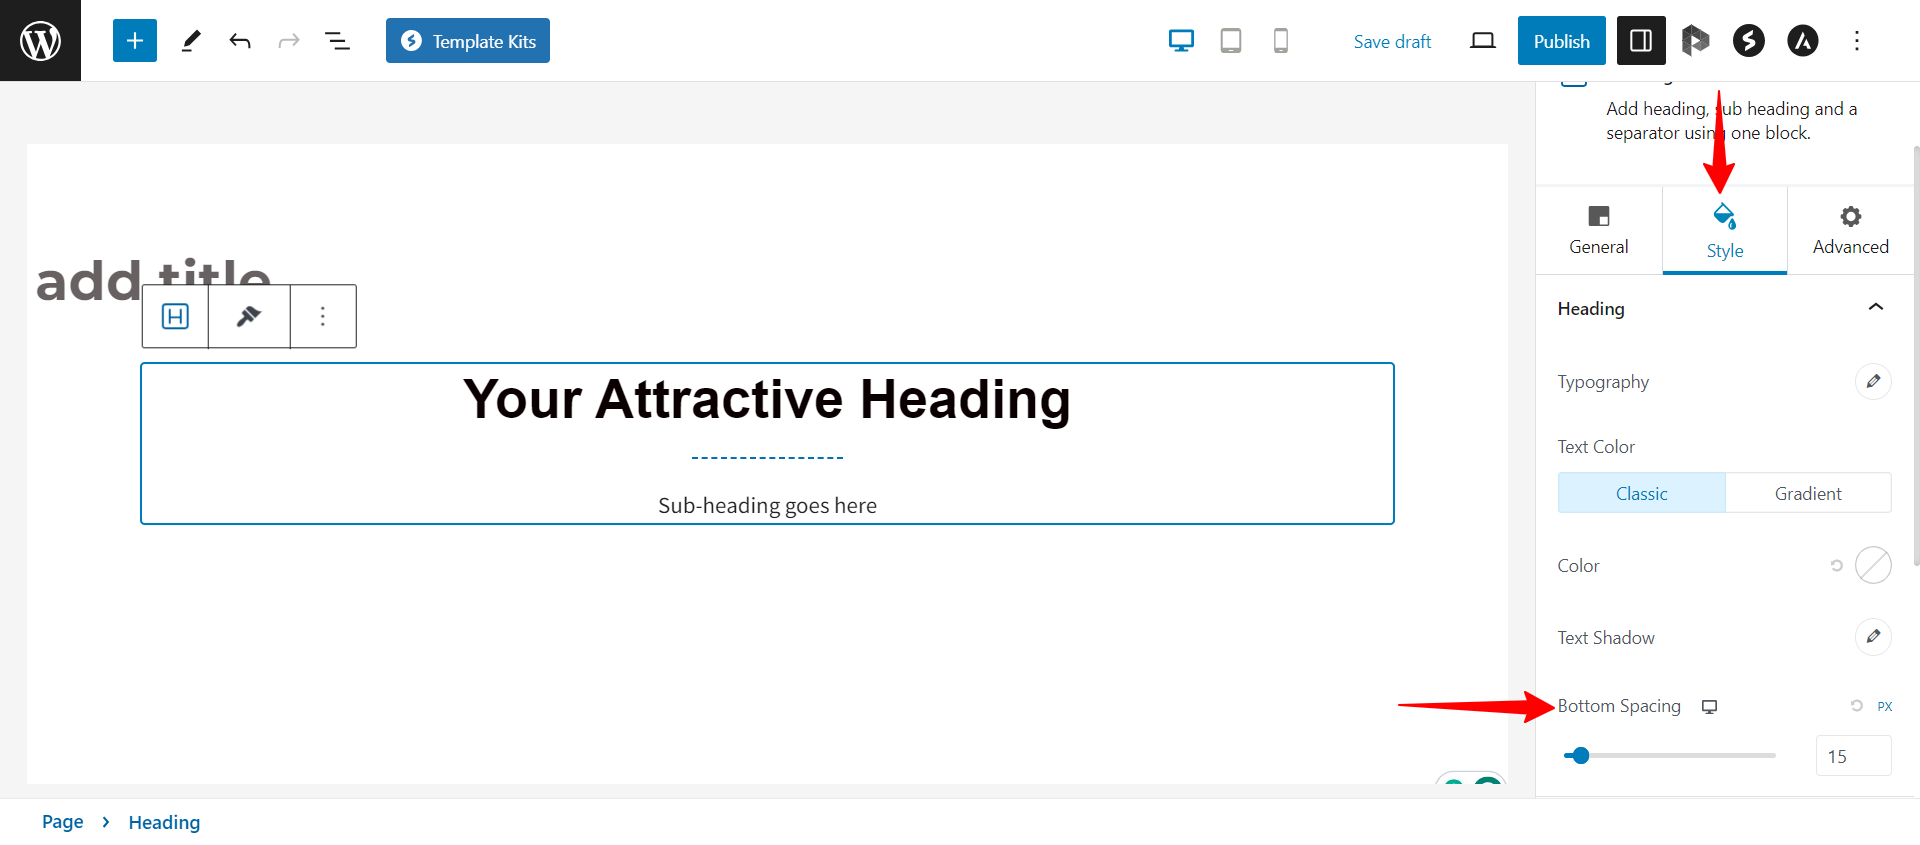
Manage Space Between Heading, Subheading, and Separator
You have the ability to control the spacing between your main heading, subheading, and the separator. To adjust these spacing settings, simply navigate to the Style tab.
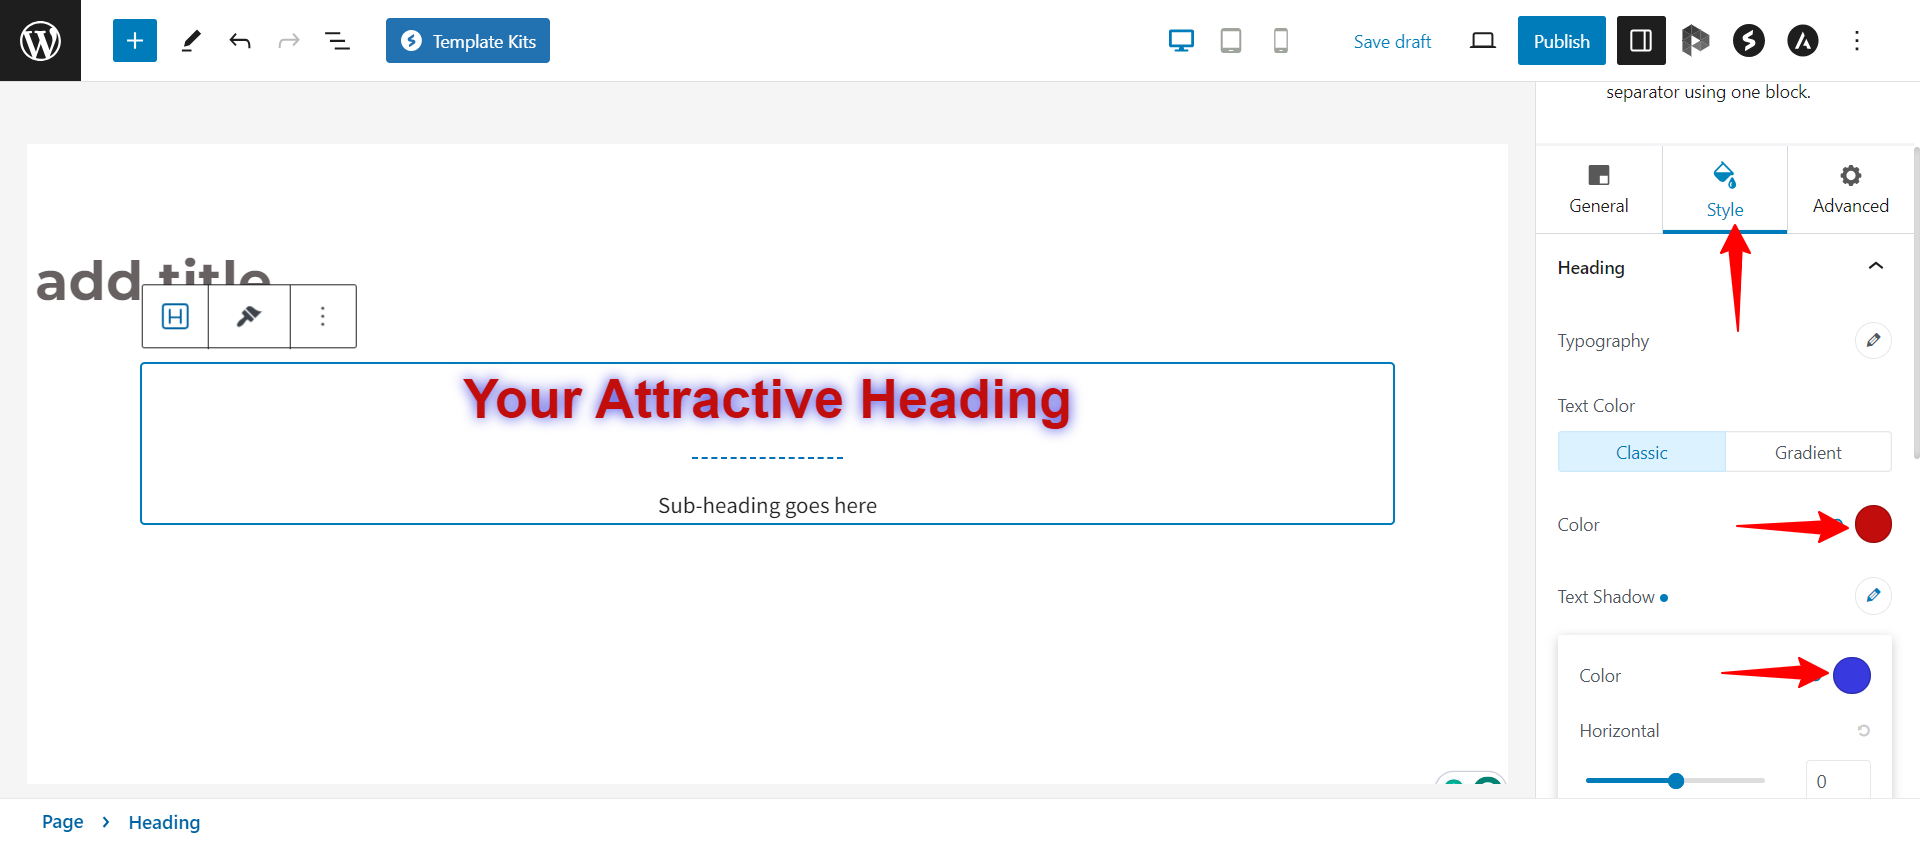
Customize Typography and Color options for Headings, Subheading
Style tab offers options to set a custom font size for the heading and subheading. You can also choose a heading tag for the heading.
Save and Publish Your Page
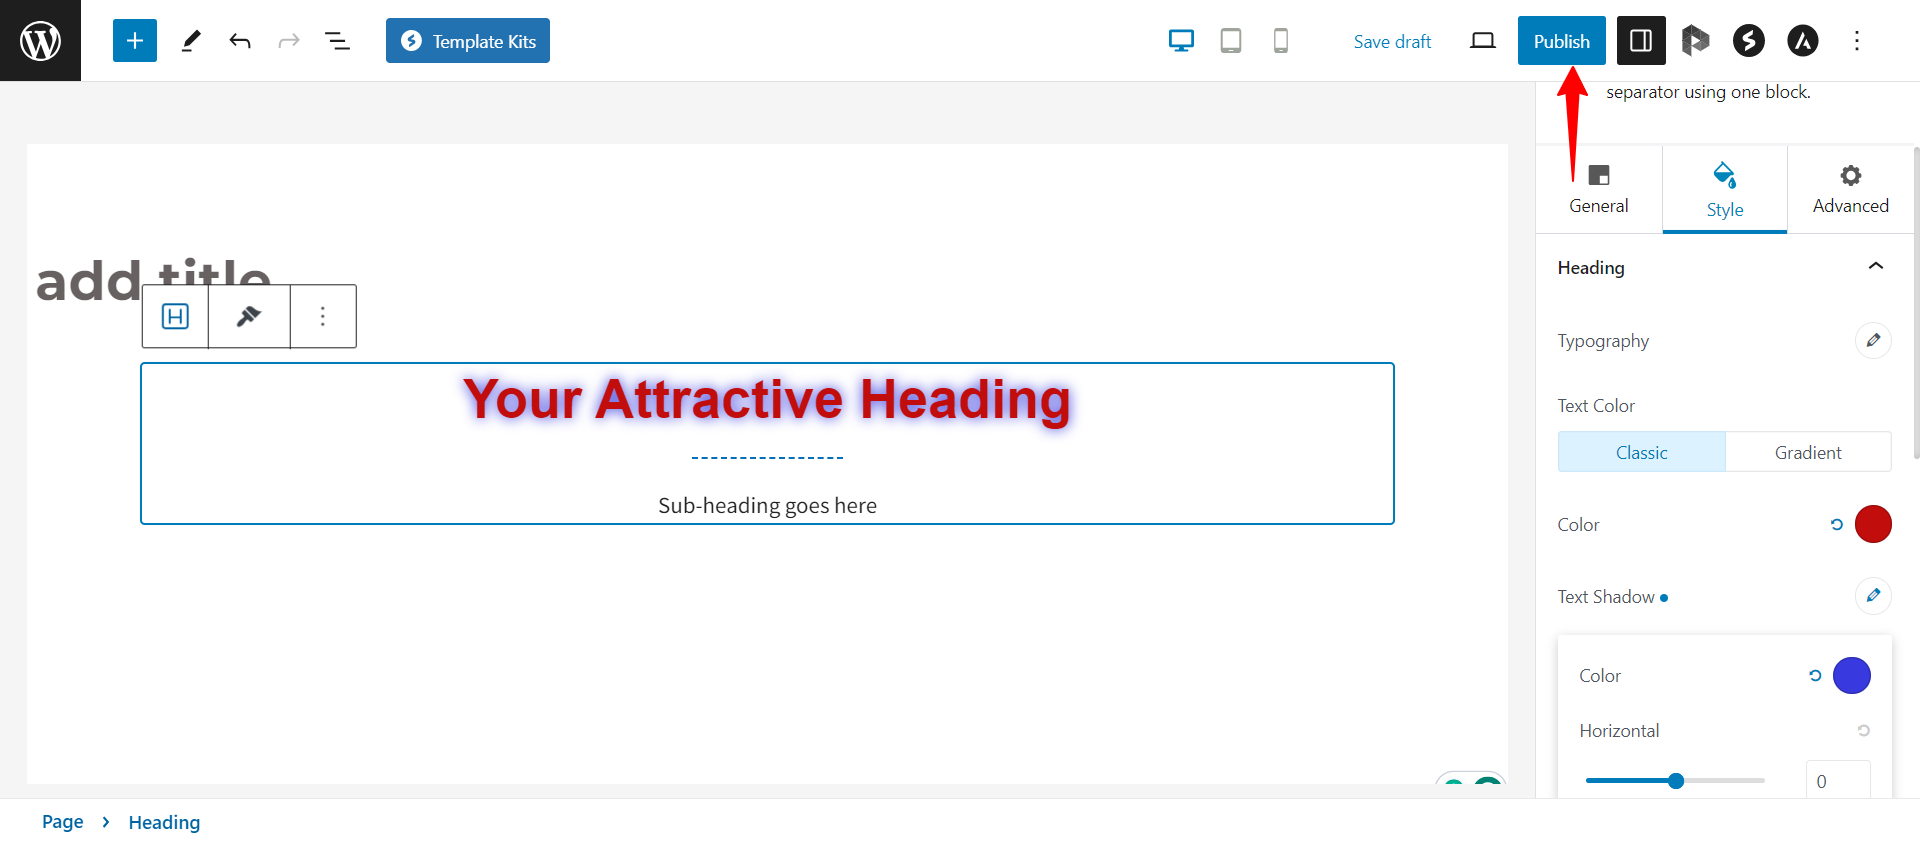
When you’re satisfied with the look and contents of your Spectra Heading block, the only thing left to do is to save and publish it.
You can do so by clicking the Publish button at the top right side of the screen.
That’s it!
Then you can preview your page or post on the front end to confirm that it looks as you want it to.
We hope this article has been helpful. If you have any questions, please feel free to leave a comment below.
We don't respond to the article feedback, we use it to improve our support content.